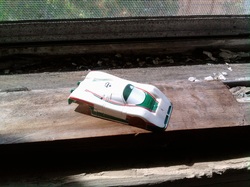
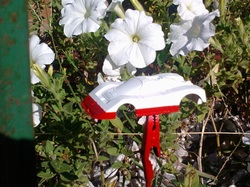
I won this GTP Jag in a box from Evilbay and it's in terrible shape and it has no wing. For some strange reason I want to restore her and race her so lets see what needs to be done to get her back in action.
As you can see the body has been beat up pretty bad on the inside and out. That's stain in the front is old cement and there's a crack inn the rear apron near where the wing was removed and there are some holes in the body that need to be patched. The chassis mounts are salvageable.
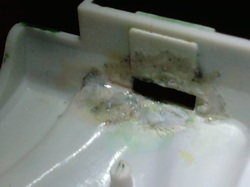
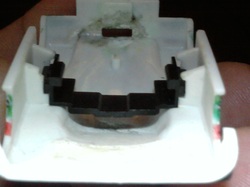
By using an old modelers technique called "Putty making" I used a white junker body and a particular Testers cement to actually make liquid polystyrene plastic that when applied joins the body on the molecular level to becomes actual plastic. Some modelers use a similar technique to repair and restore broken or missing body posts. The area that looks like shiny white paint on the left side of the hole, is the repaired crack now permanently sealed. This technique creates a bond that will not break again under normal use
If you look close to the rear panel where the wing assemble would connect with the body slightly to the right you will see the two holes that I also filled using the same technique. With the crack and the holes repaired the body is now stable enough to continue the restoration.
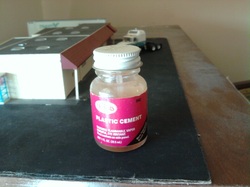
This is the Testors cement that i used to make the "Putty"
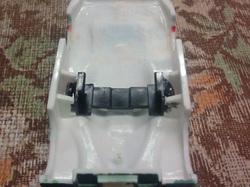
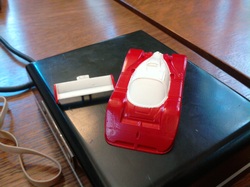
Now lets work on the mounting system and lower the body onto the chassis. As you can see I have opened the area where the body clip rests to create what known as a slide. This technique allows the body to float up in down allowing you to physically see the different positions the body can be set in.
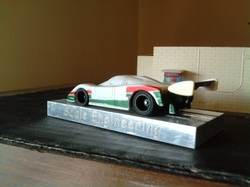
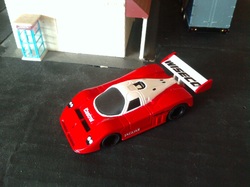
Here is a test shot of the Body on the chassis with the adjusted wing attached. We will talk about the wing in a moment.
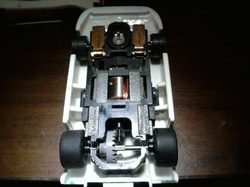
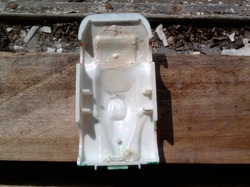
Here is a bottom shot of the chassis in the body cavity lowered.
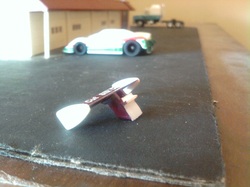
The Jag GTP body is considered the most functional body out of all the GTP's. You can actually change the cars aerodynamics and you will actually see the results in the performance. Other than lowering the body the wing is other area of the body that can be actually changed. Like in the actual 1:1 car you can re-position the wing and alter it's "Rake" or the angle that the spoiler actually sits in the air. What I've done is a 3 fold action, I've lowered the "Rake" to reduce the amount of air that hits the wing, then I lowered the complete assembly to further reduce the wings effect and finally I moved the assembly 1 mm closer the the body to help with weight balance.
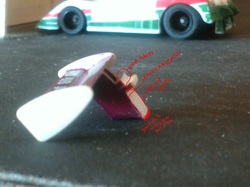
You may have to enlarge the picture but I've marked the areas that changes the wing positions. The writing is terrible I had to use a paint brush to write..but it's understandable.
It was brought to my attention that the writing on picture is too small to see so I will re-write here:
Looking at the picture this is what is written:
The first area highlighted is the area that material can be removed if you want to move the whole assembly forward toward the body. Doing this will bring the whole unit closer to the body and help with overall weight distribution.
The second area is the mounting "Tooth" that rests inside body. shaving material under the 'Tooth" in conjunction of the bottom seat of the spoiler will allow you to lower the whole assembly further reducing it's overall effect on the body.
Last is the large flat area under the mounting tooth. by removing material here on a angle will change the angle of the "Rake" of the top if the spoiler. Doing this will reduce the amount of "Air" the rake of the spoiler deflects, just like in a 1:1 car, the less air on the spoiler, the less drag (resistance). That means the there is less down force being generated on the back of the body
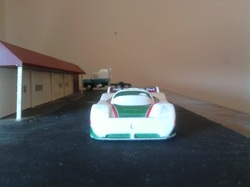
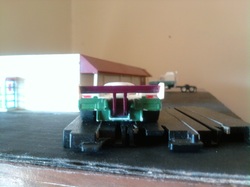
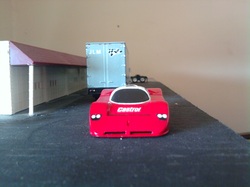
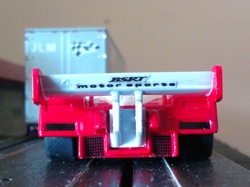
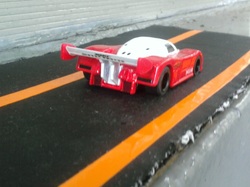
As you can see from the head on shot, the wing now sits lower and does not protrude so high into the air. This reduces the "Drag" and Aero down force on the rear of the body.
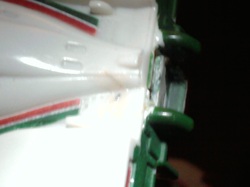
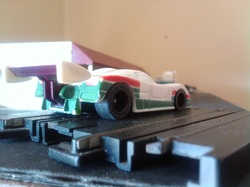
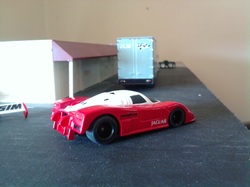
Here is a different angle shot, notice the "Rake" is now much lower to further reduce the amount of air that travels over the wing..
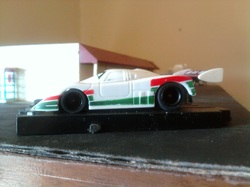
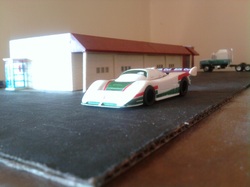
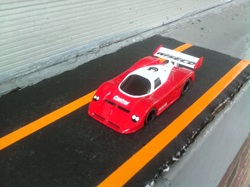
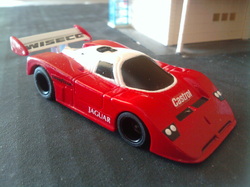
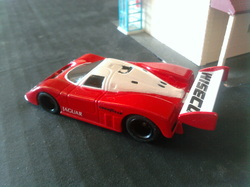
Here is a side shot of the body as it sits on a piece of Tomy track. Notice the body clearance in the front and sides along with the wheel well clearance for the stock 902 tires along with the adjusted wing placement.
Here is a rear shot with the wing....
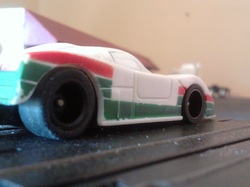
...and a rear side angle shot that also shows wheel and front valance clearance...
And finally a nice close up to show track clearance...now you have to admit...she looks good....especially those stock 902 tires on the factory double flange rear hubs and the F1 front end rims...
Up next, getting her ready to prime and paint....
Up next, getting her ready to prime and paint....
I have set the body to the desired position and 'Gooed" the body clip in place and let it cure for 24 hours. Before I start painting the car and wing will be given a soaking in a closed vat of professional strength Drano Max. Drano will remove old paint (especially enamel), and chrome plating. Because it's designed to work with PVC pipes, it will not harm plastic or adhesive that bonds to plastic. (The adhesive must be fully cured)
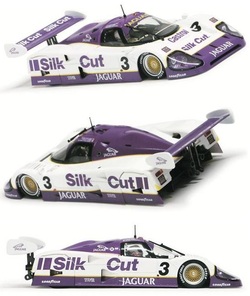
This is a picture of the new Slot It 1:32 scale "Silk Cut" XJR 12 that they are releasing soon, I'm going to copy the paint scheme but in my racing colors and decals. As you can see by the photos the aerodynamics of the Slot It Jaguar, my front rake and spoiler rake and overall positioning is very close the Slot It version. Now I'm looking at possibly adding the rear wheel skirts.......
Before we start the business of painting, we first have to finish mounting the chassis. Now that the body clip has cured it's time to remove the center of the clip to help reduce weight and allow the chassis to breathe.
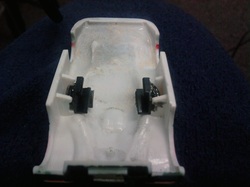
OK, this is what mounts look like when completed. The goo will keep the mounts in place until the time comes to remove them.
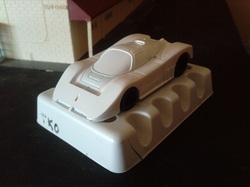
Here she is after the first coats of base white have been applied.
She's slowly taking shape.....I use this painting technique to create a counter weight with paint to off set the wing
Ok, phase two is just about complete, I need to do some touch up's but so far so good...
Coming down to the end of the project. Here she is without her wing completely painted and decaled, waiting to get clear coated
Here is a head on shot....
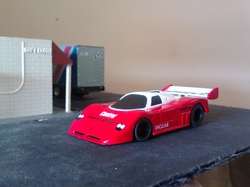
Side shot with wing attached...
What you see after I pass you....

On the track shot...
On her way back to the paint shop for clear coating...
OK folks here she is, clear coated and cured. She's ready for action ....
Thanks for checking her out...see you on the track.......
OK, back from the first track testing and WOW she runs like a dream..
Heading back to the track, see ya .....
